People online only have the attention of eight seconds to decide if they’re interested in a page or a product. So, if you want people to stay on your online business website, you need to invest in a product photography DIY setup to make attention-grabbing high-quality images.
We have sourced for thousands of clients within ten years of our sourcing career. And for most of them, having a product photography DIY set up was the cheapest way to boost their online sales.
This article will guide you on how to start building your product photography studio to create product images. So continue reading!
What do you need for a DIY Product Photography?
These are the equipment you’ll need for your product photography shoot:
- Camera: DSLR cameras give better images than phone cameras, but it’s okay if you don’t have one. Even if you don’t have fancy camera lenses and the brightest camera flash, you’ll still create decent product images if you know how to use your camera.
- Tripod: Tripods will give you stable shots. And this will also let you shoot with a slow shutter speed which will brighten up your image even if your surroundings have less light than you need.
- White background: A white background is a cheap way to make your products stand out. You can even use white foam boards from a local hardware store if you’re on a budget. I initially used Background remover app that helped me to add whatever color I wanted in the back.
- Lighting equipment: There are two types of light sources in photography. You can use natural or artificial lighting. Natural light refers to light from direct sunlight or your window light. On the other hand, Artificial light refers to light from light sources with light bulbs.
- Designated shooting area: You can’t have a DIY product photography studio without a permanent photography space. So, it would help if you prepared a designated area where you can shoot anytime you need.
- Photo editing apps: Photo editing apps and software are essential in having studio-grade images. In post-production, you can adjust the color, white balance, contrast, and background of images. There are many free apps on Mobile, but if you want paid tool then no doubt ADOBE Photoshop is the best. Canva is good if you are on a budget.
Suggested reading: Amazon Product Photography for Your Website
Benefits of DIY Product Photography
- It’s a cheap way to build your brand image.
If you’re on a budget and want to build your brand’s image, DIY product photography will be your friend. Building your brand’s image is crucial in starting an eCommerce website. And in DIY product photography, the high-quality product photos you’ll produce will make customers trust your store’s capability. You save Photographer costs and even build a connection with your business by putting own effort. I’m sure in the end you must learn something.
- It will increase your product sales.
It’s been proven that product photos make customers buy online products more than captions do. DIY product photography makes your products stand out and look reliable, directly affecting your sales. Neat-looking images will capture the short attention span of potential customers, and the more attention you grab, the more likely it is for you to sell your product.
- You don’t need fancy equipment.
In DIY product photography, you can use smartphone cameras to make quality images. You don’t need a professional camera as long as you know the necessary steps in doing DIY product photography. The Key purpose is clear images that show the use of products with features. If you could do it with a simple phone or camera, then it’s all good.
How does DIY Product Photography shoot?
Whether it’s for food photography, lifestyle photos, or product photography, these six steps will guide you in having a successful DIY photography process.
Step 1: Plan
Before you start to begin your shoot, make sure that you plan what your goals are first. Use a planner and list everything you want to do in your photography session. Know how many products you want to take pictures of. And, think about how many angles you want to take for each product.
Ask yourself questions like:
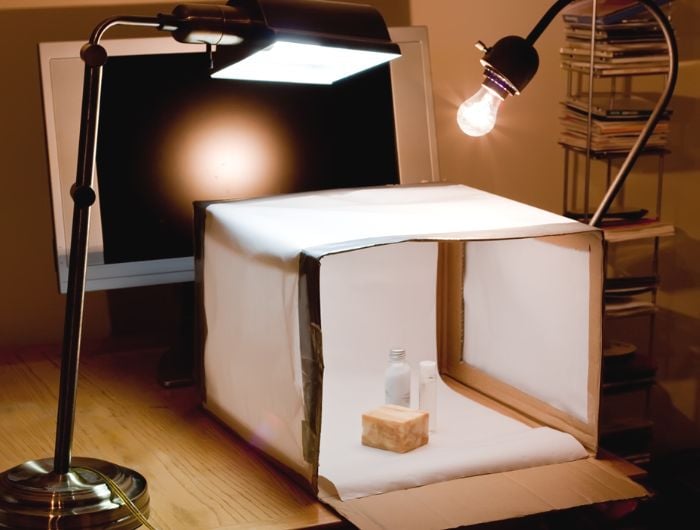
- Do I need a light tent to create even lighting?
- Am I going to use natural lighting or artificial one?
- How should each final product image look?
- How many angles should I shoot for every product?
I usually have my sheet in which I WRITE down all these things. Yet I add what features I need to elaborate on in my photography.
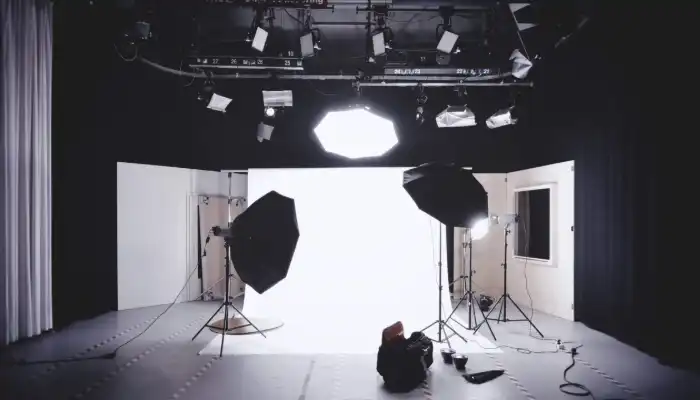
Step 2: Prepare
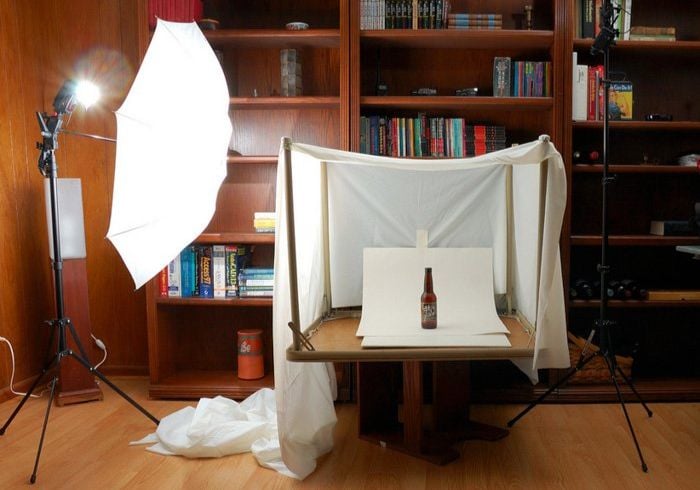
Preparation is extremely crucial in DIY product photography. And so, you need to create a photography studio that you can use anytime you need to. There are plenty of photos of DIY studios on the internet to get inspiration from, so research before you build your studio.
Make sure that your studio has enough lights. Whether you plan to use natural light or artificial light, ensure that your lighting setup produces even lighting across your room.
Set up your tripods and cameras to optimize the light of your studio. And, if you’re planning to use both a DSLR camera and a phone camera, make sure that your space can accommodate both.
Step 3: Stylize Your Products
Check for flaws. Before taking photos, make sure that your products are as perfect as possible. Ensure that there are no labels or tags that can make them look unprofessional.
If you want to show special feature then capture images of it’s use. Also add INFOGRAPHICS at the end with Canva. Improve your product’s presentability if you can. For example, if you’re selling leather shoes, you should polish them first before starting your shoot. The more you stylize your product, the better your image will be. So, make sure to make them look as presentable as possible.

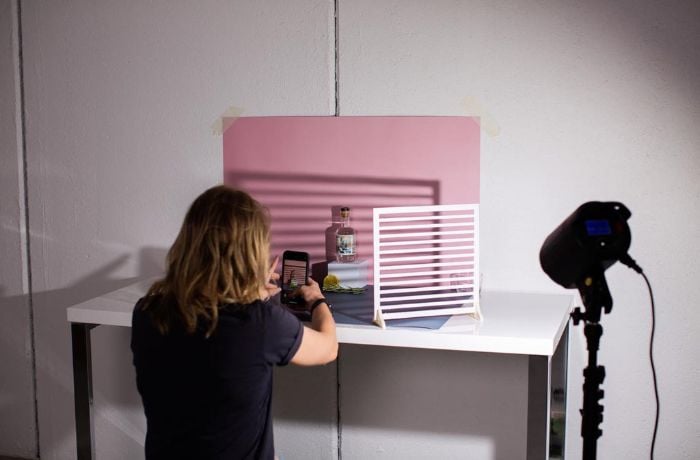
Step 4: Capture Your Shot
After doing all the preparation, it’s time to capture your photo. Capturing a product’s image is all about experimentation. Experiment with angles, lights, and product placement. Take as many shots as you need, and make sure not to delete images until you see them on screen.
Shoot in the manual setting if you can. Play with shutter speed, ISO, and aperture as much as you need. But it’s recommended to use auto white balance as it’s unnecessary to move this setting around.
Step 5: Process Images
To further enhance your photos, take time to process them. Make slight adjustments and improvements in their brightness and color. You can also manually change the background of these images if you didn’t use a backdrop during your shoot. If you’re going to edit in the background, use a white background as this is the most professional-looking color for product images. If you don’t know about these processes, then YOUTUBE and Skillshare are the places to learn about these things.
Step 6: Review & Publish
The last step is to review your images. Make sure that your photos are as you imagined them to be. In publishing images in online stores, ensure that you use the file size recommended by your platform. And make sure to name your images appropriately.
Looking for the Best China Sourcing Agent?
Leeline Sourcing helps you find factories, get competitive prices, follow up production, ensure quality and deliver products to the door.
6 DIY Product Photography Tips
Here are six easy tips you can follow to have product images suited for your eCommerce store.
- Know your camera settings
Digital cameras let you shoot product photos with more freedom than phone cameras. If you’re going to use digital cameras, know your settings. Study the camera lens that you have and experiment with shooting in manual. Make sure to practice without using your camera’s flash, as it can create harsh shadows, which will reduce the image quality of your product shots. I go to youtube and Type my camera model along “Settings” keyword. It would show me all the tutorials and guides for my Camera.
- Have enough fill light
There’s no way to stress this enough, but the lighting in product photography will be your best friend. With enough light, even images taken from a cell phone can look like you took them from a digital camera. An even soft light across your shooting area will make all the difference in the photography process.
- Bounce light
As mentioned in the previous tip, it’s important to have enough light in your studio. And the best way to create softer light is to use a bounce board. Use a foam board, poster board, or even white paper to bounce your light. They are effective light bounce boards and can also be used as a white backdrop.
- Shoot from multiple angles
Successful product photography is not just about making high-quality product photos. To be successful in your DIY product photoshoot, you need to be able to sell your goods. Further, entice customers by showing them high-quality photos from different angles to enlighten them on what they will get once they order. See your product from a different angle as a customer and observe it as a photographer. You would get all of the new angles and even new ideas to click pictures.
- Edit your images
You can create a high-quality product photo even with your smartphone camera. But, the key deciding factor on whether or not you’re going to succeed is how you edit your images. Watch tutorials and experiment with editing your photos.
- Optimize Images for SEO
Name your images properly and use the correct number of pixels for your platform. Don’t use all the available pixels you can use, but don’t use too few pixels either.
For Shopify, for example, the ideal image size is 2048 x 2048, so check the recommended file size for your platform before you list your images. Also I rename my images with their main keyword, It helps in SEO of your product listing.
DIY Product Photography vs Professional Product Photography
DIY product photography
Pros:
You know the product photos you want for your online store as a seller. So you can create the image you want exactly as you want it. You can create high-quality product images for cheap as long as you practice DIY product photography. It saves you on operational costs, and if you are a small business owner, then it would teach you something that you use in future ventures.
Cons:
If you haven’t done any photography sessions before, it will take a bit of practice to use the camera’s manual setting at first. You also need to know how to use photo editing software which can take some time to learn depending on your current skill level.
Professional product photography
Pros:
In hiring a professional photographer, you get the highest quality photos possible with little to no effort. You also won’t need to study the post-production editing process as they will be in charge of providing you with professional product photos ready to be published.
Cons:
Professional product photography can be expensive, especially if you’re on a tight budget. In my experience, I initially went with DIY and then turned into professional imageries. It is only because I was profitbale enough to afford it. And, the photos they give you might not turn out exactly as you expected.
Looking for the Best Chinese Products?
Leelinesourcing helps you find the Best Products Made in China with high quality at an attractive cost.
FAQs about DIY Product Photography
How to set up your DIY Photo Studio?
Set up your DIY product studio by ensuring you have a camera, tripod, enough lighting, and a photo editing app.
Why do you need a DIY Product Photography Studio?
You need a DIY product studio if you need a cheap way to create high-quality product images. A home photography studio can help build your brand’s reputation even on a tight budget.
Is there an app for product photography?
You can use some apps to edit your product images: VSCO and Adobe Photoshop Express. If you’re using a desktop, you can also use software like Photoshop and Lightroom to enhance your product photography.
What’s Next
A DIY product photography studio will make a massive difference in your online store. Online customers look at images before reading the product title or caption. So, having optimized images will guarantee you sales and eCommerce success. It won’t cost too much to make a DIY studio, and it will guarantee you profit in the long run.
We can help you find suppliers that can provide you with quality products worthy of being photographed. So, contact us, and we’ll introduce you to reliable supplying companies for your online business.