Have you ever wondered why that jewelry picture attracts you? Well, the answer to that is consistency and accuracy.
Product photography is somewhat tricky. As for jewelry photography, it requires additional tips and tricks. The jewels are shiny, and the pieces are small. It makes it hard to capture those pictures.
Leeline Sourcing is a pioneer in the e-commerce industry with an experience of over ten years. In our tenure, we have helped many people improve their product photography and experienced outstanding sales.
With the proper knowledge and equipment, you can easily shoot jewelry. This article will cover the requirements needed when shooting.
What is jewelry photography?
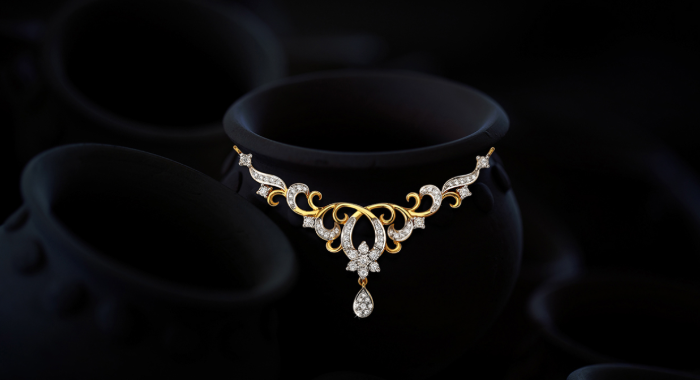
Jewelry product photography is a method of showing intricate details of the jewelry. People create compelling images of jewelry products to entice the buying customer.
Many brands and businesses out there are selling jewels. So, to attach more customers, brands hire professional photographers. They take pictures of the product. With the help of photography, a business can market critical details of its gold products.
Types of jewelry photography
Getting the right shot in jewels photography can create a positive effect. So, it is essential to know what type of photography you are using. Here are the types of photography that you can use while taking shots of jewelry products.
- Studio Shot:
The first type of shot is a studio shot. In this method, the items are placed on a white-colored background. It enhances the details of the product.
- Scale Shot:
In Scale Shot, the details of size/measurement get shown using a macro lens. With this picture, customers can see whether the item is big or small.
- Detailed Shot:
Detailed picture photography shows every detail of the product that is not visible to the naked eye—for instance, the placement of diamonds, curves, patterns, and more. From experience, this shows buyers that you’re honest and transparent with what you sell. They appreciate it even more if you include any small defects (if there are any) in the product description. In addition, multiple pictures get taken to convey the product’s aesthetics.
- Group Shot:
Another type of photography is group shots. This type of shot is used if you have multiple products with different varieties.
- Natural Shot:
The natural shot shows how the jewelry product looks in real life. With this shot, customers can predict whether the item will look good or not.
Equipment required for jewelry photography
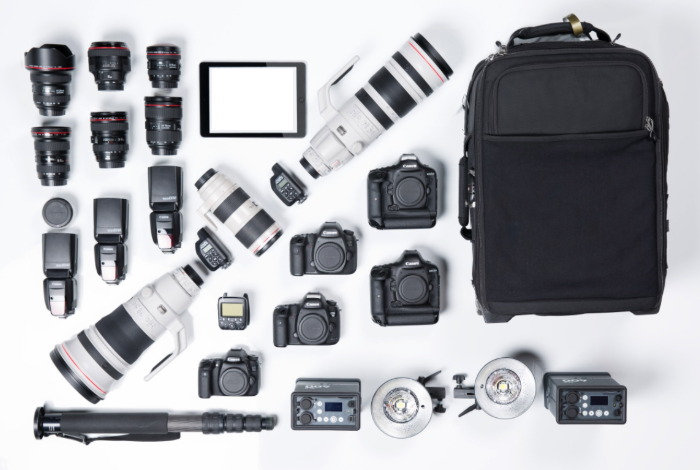
Getting the right photo requires good equipment. This section will discuss what equipment is needed to create unique pictures for an online store.
- Camera: There is no need for any expensive professional camera to shoot the product images. A good iPhone or Android also works. Moreover, if you already have a DSLR with macro lenses, you can also use that.
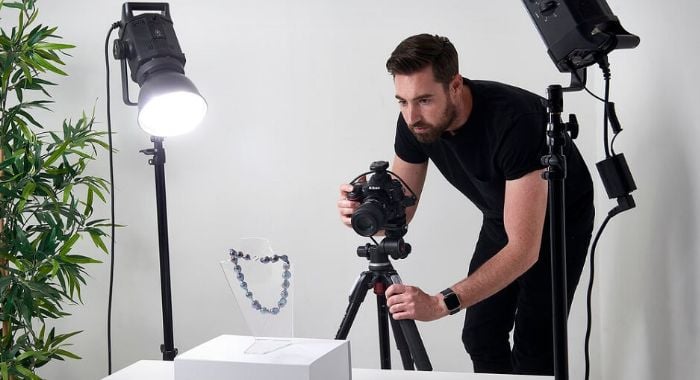
- Tripod: If you take pictures while holding the camera in your hand, you will most likely take blurry pictures. To avoid a camera shake, you have to use a tripod. Tripods are readily available on online stores like Amazon or eBay.
- Good Light Source: Light sources play an important role in jewelry images. A good light can create a fantastic depth of field. So, take pictures near window if you want to photograph jewelry at home. I’ve seen jewelry listings that are photographed with poor lighting. As a result, they remain unsold for months. So if you want to enhance your pictures using artificial light, you can buy jewelry photography lighting kits that include a light tent, camera flash, lightbox, and other items.
- White background: If you are planning to showcase critical details of the product, you will need a pure white background. The white background removes unwanted shadows and does reflect light from the camera’s flash. This lightning setup creates stunning images.
- Foam boards: Foam boards allow good white balance settings. In addition, it captures reflected light from that shiny jewelry piece.
Suggested reading: Amazon Product Photography for Your Website
Looking for the Best China Sourcing Agent?
Leeline Sourcing helps you find factories, get competitive prices, follow up production, ensure quality and deliver products to the door.
How to shoot jewelry photography?
Let’s start taking breath-taking pictures of your jewelry for your eCommerce store.
Step 1: Prepare props
First, you will need to prepare the props for a photoshoot. For example, use a rod to hold the jewelry pieces. Or, you can also use the strings to bind the rings.
Plus, if you are a fan of RGB lights, you can also use that. In simple words, create props that will give an aesthetic look. I’m telling you, the more visually appealing your pictures are, the more likely they are to attract more customers. So doing it right will provide you with more sales.
Step 2: Choose the right lighting
In the above chapter, we discussed lightning. Soft light creates a good effect. If there is a bright light, it will create harsh shadows. If you are going for natural lighting, you are good to go. If artificial lighting, you will need a proper setup. Consider the one that suits you the best.
Place the light and softbox at 45-degree from the item. Then place the camera directly in front of the product. Then, adjust the camera’s location to avoid shadows or hard light effects.
Step 3: Try different angles
One of a few tricks in shooting jewelry is trying different angles. That is because different angles capture a different side of an item. Consider going for portrait photography or landscape one. You can also snap zoom-in or zoom-out pictures of that diamond ring.
Step 4: Use a sturdy tripod
A tripod will snap blurred free images. Use a tripod to photograph jewelry to avoid extra blurry elements in the picture. Plus, the tripod will keep your hands free and avoid any strain.
Step 5: Start shooting
Once everything is set up, start the shoot. Try different angles and see which ones are filling the light. Take multiple shots at these angles. Set your camera at a slightly downward angle. If you capture moving products, you have to select the correct aperture and much lower shutter speed. Consider using autofocus from the camera settings to take mesmerizing images.
Step 6: Post-processing
After taking pictures, it is time to do the magic work. Open up the PC, and start editing the product images. If there are any black background images, consider increasing the contrast. Pure white-colored background images require a touch of white balance. Then, create a final image by setting proper exposure and uploading it to the website.
Common mistakes to avoid

It is essential to highlight the item’s details whenever you are selling jewelry. Otherwise, your customers will not buy products. But, unfortunately, even simple things can give a wrong impression when taking pictures. This chapter discusses people’s common mistakes when taking pictures of their products.
1. Messy Preparation
People’s first mistake is trying to perfect the images using photo editing. But unfortunately, they neglect key details like removing the tags and cleaning the items.
2. Artistic background
Yes, these types of backgrounds work when you take pictures of large items. But, they are not suited for gold rings, necklaces, and other jewels. Since these items are small in size, a busy background will hide the key features of these products.
3. Inconsistent White Balance
White balance plays a vital role in photographing jewelry. For instance, if you take photos of a gold necklace, selecting the wrong white balance will affect the gold color. It took us weeks before we mastered this technique. So, before taking that shot, ensure that you know how to adjust the color balance.
Looking for the Best Chinese Products?
Leelinesourcing helps you find the Best Products Made in China with high quality at an attractive cost.
FAQs about Jewelry Photography
What is the best lighting for photographing jewelry?
When taking a shot of jewelry photos, the lighting setup is soft lighting. For instance, you can place the items alongside a window. And, if that is not possible, you can use a light diffuser to get a soft effect.
Which is the best lens for jewelry photography?
Since jewelry items are small items, you have to shoot the essential details. Therefore, the macro camera lens works best for these types of items. That is because the macro lens focuses on a larger scale.
How do you photograph jewelry in natural light?
Doing photographing jewelry under this light setup is somewhat easy. You will have to place the items at a 45-degree angle with the light. It will fill the light and highlight critical details.
How much does jewelry photography cost?
There are two ways jewelry photographers work. Either by hourly rate or by per image. A good photographer will take about $25-$30 per image. A high-end photographer will do the work at $600/hr.
What’s Next
The best jewelry business out there will always have one thing in common, they will have amazing photos. Getting the right image for your website does not require time or effort. You can easily photograph jewels in your home. But, you have to prepare for it. Props, background, and photo editing skills will help create compelling photos.
If you are looking for professional help on how to market your jewelry products and have more sales, don’t hesitate to contact us.