Did you know that a decent white background product photography can generate more sales than a good product caption? Based on many surveys online, consumers stated that images influence their purchase more than words do.
We’ve catered to over 2000 clients within the ten years of our product sourcing career. And when businesses ask us for tips to generate more sales, the one piece of advice we always give is to optimize their product photography.
This article explains why and how you should take your own product photos using a white background, so scroll along!

- When to use white background photos?
- Why use white backgrounds?
- Pros and Cons of using a white background
- Equipment needed for white background product photography
- How to take white background product photography?
- How to edit white background product photography?
- 4 Tips for white background product photography
- FAQs about White Background Product Photography
- What’s Next
When to use white background photos?
Use a seamless white background when you want to isolate your subject in shooting portraits or when doing a DIY product photo.
Images are the first thing customers look at. So, if you want them to look at your goods right away, use a white backdrop to draw their attention to the product.
Why use white backgrounds?
Here is the list of reasons you should use a pure white background for your product’s images.
- A white background makes your products stand out.
The sole reason why I use the WHITE BACKGROUND is the focus. Buyer can focus on my products. And probability of sales increase.
Without too many distractions, consumers will know what you can offer right away. This is important in E-commerce businesses. Because looking at product photos is the only time customers can visually see your product on screen.
- They’re easy to edit.
White background photos are easier to modify than product shots with colored backgrounds. So, you can have versatility in the future for your product photos.
- They will make your store look professional.
As a business, it’s crucial always to appear professional. Using detailed shots of your product show will make your store look professional as it gives consistency. A consistent white background in all your product images will make you come off as a capable business.
Pros and Cons of using a white background
PROS:
- It boosts sales.
According to eBay, listings with professional-looking images are 5% more likely to sell. They recommend sellers to use non-distracting backgrounds, which a white background can offer exceptionally well. Also, as we mentioned in the intro, customers themselves testified that a neat product image influences their decision to buy a product.
I conducted a RESEARCH in the background. White BACKGROUND has increased my sales by 5-10%. It is still enough revenue.
- It’s cost-efficient.
Have you ever wondered why companies like Apple use white as their primary brand color? The main reason is the color white gives off a professional atmosphere with little effort. Using a white background is cheap, but it will make your business look luxurious like Apple is.
CONS:
- For beginners, it can be hard to avoid shadows during DIY product photography.
One disadvantage of using a white background is that, it can be hard to find the right camera settings when doing DIY photography with a white background. Unwanted shadows can appear when you don’t have the proper light source and lighting set up.
But don’t worry! We have product photography tips on how to avoid this problem down below.
Suggested reading: Amazon Product Photography for Your Website
Looking for the Best China Sourcing Agent?
Leeline Sourcing helps you find factories, get competitive prices, follow up production, ensure quality and deliver products to the door.
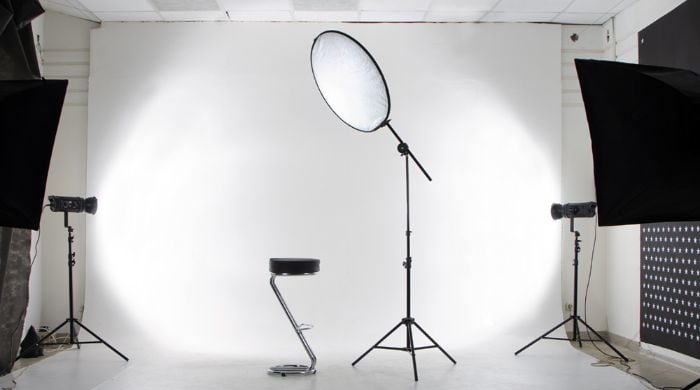
Equipment needed for white background product photography
Here are the pieces of equipment you’ll need to do high-quality product photography for your online business.
- Shooting Table: This is where you place your products.
- Light sources: You need to pay great attention to your lighting setup. You can use a light tent, lightbox, or even natural lighting to your advantage.
- Professional Camera: Choose a camera and camera lens best suited for your products.
- Tripod: This ensures that your shot is steady even if you shoot it from different angles.
- Plain White Background: For this, you can choose your preferred materials. You can use a foam board, white paper, white space or a white wall.
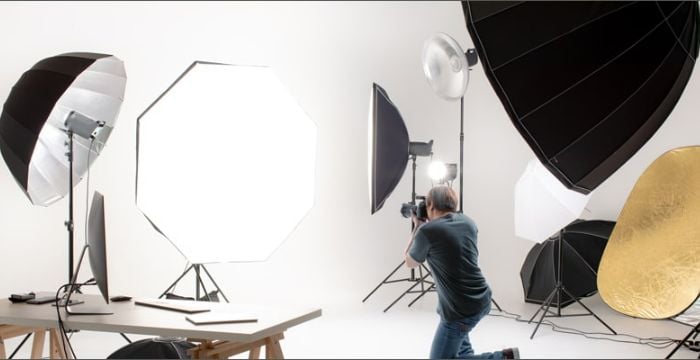
How to take white background product photography?
Here are the six steps in doing successful product photography. Do these steps in order, and you will get high-quality images that look like they came from a product photography studio.
1. Choose the type of lighting
The first step is to choose what type of lighting you’ll use and how many of it. You can use direct light from studio lights, but alternatively, you can also use natural light to your advantage. The latter is the cheaper option, but you shouldn’t think it’s worse. Some professional photographers actually prefer natural light, AKA direct sunlight, making images look natural, especially for lifestyle shots.
I have a SPECIAL ROOM for photography. Ans Installed lights Direct light allows Excellent photography. You can try it for HIGH QUALITY IMAGES.
Use at least two lights if you’re going to use artificial lights. Place one of the lights at the back; this is your fill light or background light. And place the other one at the front, which will be your key light.
2. Set up your background
Regardless of the studio lighting you choose, ensure that your background has a curve from top to bottom. Don’t make a sharp angle between the background and the ground. Or else it will show in your final image.
3. Position your product
Position your product correctly to optimize your shooting table. Place your product in front of the “curve” of your background material and place it on a flat surface. At this point, you can adjust your lighting again and use more or fewer lights as you see fit.
I use the 360 DEGREES positioning. It allows the PHOTOGRAPHY with a wide diversity. And the results are quite amazing.
4. Set up your tripod
Using a tripod ensures that your shots will be steady. It also allows you to use a fast shutter speed, allowing images to have the sharpest focus possible. You’ll also have a consistent distance between the product and the camera, making having uniform shots for different variations of the same product easier.
Doing this will give your online store consistent images that look like a professional photographer has taken them.
5. Get your camera right.
As I use the 360 degrees PHOTOGRAPHY, the camera position is the key. You should have the right angle when taking a PHOTO. It gives accurate images.
Next, you need to ensure that your camera settings are optimized for product photography. Check all the settings and adjust how you see fit. Here are basic key reminders for changing your DSLR settings:
Image Size: Whenever possible, take your product images in raw. A bigger file size means you can capture more details.
ISO: It’s always best to keep your ISO at the lowest number whenever possible. A higher ISO means a brighter image, but this also results in more distortion to the picture.
Quality: Set your image quality to the highest possible setting.
White Balance: For beginners, it’s best to put this setting on automatic.
6. Taking the product image.
Now you’re all set up to take your product image. Take images from various angles, and highlight the details you want customers to see.
Note: Don’t delete pictures until you see them on the computer screen. You can delete images right away, but you can’t restore photos quickly.
How to edit white background product photography?
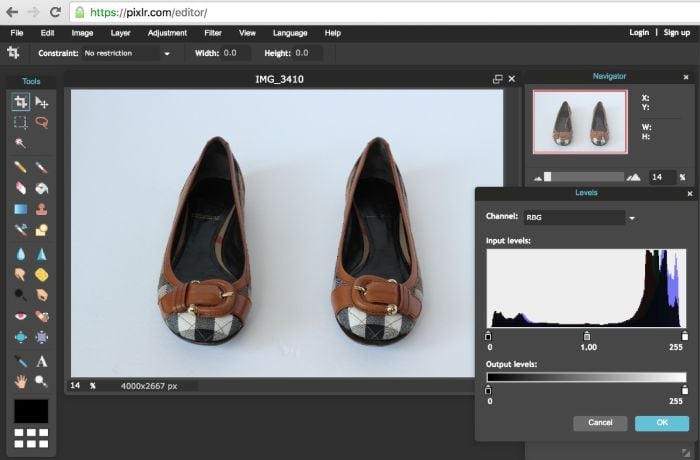
There’s a bit of a learning curve in editing a white background into your photos but don’t worry, as these steps will guide you on what to do.
Step 1: Background removal
The first step in editing white background in professional product photography is to remove the existing background. For this, you can use post-production software. The most popular option is adobe photoshop, but there are also free tools available online if you don’t have any software, so don’t worry.
Photoshop is my FAVORITE. It gives a wide RANGE to pen tools to select and remove the background. However, you can use other tools.
Step 2: Adjust the brightness
Lighten up the image’s background so it doesn’t appear light grey or dull.
Step 3: Remove any spots
Once you adjust the brightness, it will be easier to find any fibers you couldn’t delete in the first step. Remove these spots to make your image look neat.
Step 4: Adjust the color
Adjust the saturation or exposure in your image. Remember to make your product pop but make it as close to its realistic image as possible.
My tip!
Color is aesthetic. I will not compromise on it. Choosing the right color attracts the human eye and gives a SPECIFIC message.
Step 5: Resize and save your image
Lastly, resize your image for the platform you’re going to post it on. Make sure to name your files correctly to optimize SEO searches.
Looking for the Best Chinese Products?
Leelinesourcing helps you find the Best Products Made in China with high quality at an attractive cost.
4 Tips for white background product photography
Tip 1: You can use your phone if you don’t have a DSLR camera. Just make sure to put it in the highest possible settings possible.
Tip 2: Brighten your backdrop as much as possible without affecting the subject. Optimize your lighting kit and make your backdrop as white as possible. This will make your product pop out.
Tip 3: If you’re a beginner, stick to free photo-editing software on the internet first. I prefer GIMP. You can use many others if it looks tough. They are easier to use, and you will also save money.
Tip 4: Practice makes perfect. Don’t give up if you don’t get high-quality shots right away. Keep trying, and you will undoubtedly gradually be better at product photography.
FAQs about White Background Product Photography
How to take headshots using white background?
In taking white background headshots, make sure there’s space between the subject and the background. Light the background completely and focus your camera on the subject to make the background look blown out.
How to photograph White on White?
To photograph a white on white, increase your background’s lighting. Doing this gives your product less light, making it pop out from your firm, pure white background.
Which is the best material to use as a white background?
Vinyl is the best material to use as a backdrop. It’s opaque, which enhances the color vibrancy of images, and it’s durable as well.
How to set up your equipment?
In setting up your equipment, ensure that you give enough light to your background and your camera is in the correct settings. Set up tripods for image stability and ensure that you can easily approach your table.
What’s Next
Professional product images are essential in having a successful eCommerce business. So, make sure to take your product photography seriously. Your product’s image will be the first thing your customers will look out for, so use a white background to make your product pop out. Highlight the selling points of your goods, and you will be racking up orders in no time.
If you’re still searching for suppliers of goods worthy of being photographed, we got you. Leelinesourcing is in touch with a variety of supplying companies. Contact us so we can assist you further in your eCommerce business success.