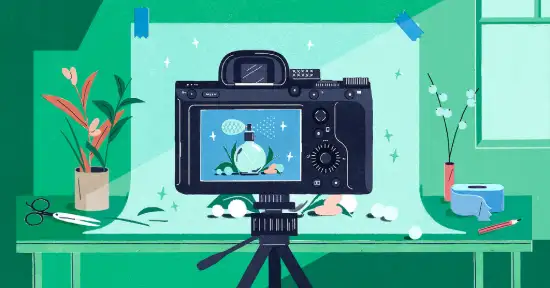
Amazon Product Photography for Your Website
Leeline Sourcing is one of the TOP companies with the best photographers. From photography to infographics, you get the BEST for your Amazon store. We take pictures of your products. Make it fit for your AMAZON FBA products. And you attract more consumers.
Skyrocket your sales with our experts.

5000+
Happy Clients
85%
Average Profit Increase
250000+
Photosies We Delivered
10+
Years Of Experience
Our Service List of Amazon Product Photography:
Amazon Product Photography
Leeline Sourcing has a SPECIAL TEAM of trained professionals. We dedicate the TOP PHOTOGRAPHERS for your Amazon product photography. You get PROFESSIONAL-LEVEL product and lifestyle images.
Move with the ADVANCED strategy on your Amazon account.
Product Photography
Our dedicated team puts effort into converting your dreams into visual descriptions. We take your PRODUCTS. Take pictures from 360 degrees. And convert it into a MORE APPETIZING picture.
Your customers get ATTRACTED to your store more than competitors.
Shopify Product Photography
The first thing that attracts SHOPIFY BUYERS is the product photos.
We have got some experts to HANDLE product visualization. Our graphic designers choose the BEST filters to make your picture more effective. You’ll be AHEAD of your competitors with our designed pictures.
Enjoy the BEST SERVICES right away!
E-commerce Photography
Leeline Sourcing STRIVES for multiple types of eCommerce photography. If you need 3D images, we do that. If you ask for a SPECIAL demand, we do that on your request.
Get our TOP TEAM to handle your eCommerce visualizations.
Our services
Our Amazon Product Photography
Our expert team knows how to DRIVE more sales. So, we keep our TOOLS ready to serve. From lighting to PHOTOSHOP editing or illustration, we are READY. Our team takes over lifestyle images of your products.
You have THE BEST Amazon photography services with our team.


Our approach
Get Great Product Photos Fast With LeelineSourcing
- Fast Response. We respond to your photography requests FASTER than any other. You get exceptional Amazon photography services with timely implementation of your requirements.
- Guaranteed QUALITY images. We believe in QUALITY product and lifestyle images and provide them. You expect the ULTIMATE quality.
- Infographics availability. Our graphic designers have all the facilities. If you need infographics, we offer that too. Ultimately, you get The TOP solution with our team.
- Trained experts. Our team is QUALIFIED and followed our quality criterion. Moreover, training and years of experience make them the TOP photographers. You get your Amazon product photography effortlessly and improve your brand image .
How to Work with Us?

Contact Our Team Online
To work with us, you have to LET us know. For this reason, join us online. Our experts connect you and GUIDE you through the Amazon photography services process.

Ship and Take the pictures
We ensure you send the products to us. Our staff will CHECK the products. Make them ready for photography. And take pictures.

Upload and Download
The job is still not done. We upload the products on our SERVER to let you download them. If you want pictures in your inbox, we do that too.
our satisfied Clients


2000+ Clients Trust LeelineSourcing
I sourced all kinds of stuff for my company for about 1 year with Leelin. They have really good service, their team is polite and trustworthy. I definitely recommend you to work with them.
Levi
I worked with Leelin for 2-3 years to build my brand. They check each item and does my customs clearance get into Amazon warehouse. I love their service, it saves me a lot of time. If you are also developing your business in China, they will help you do it smoothly.
Belinda
Working with Leelin is really positive, they are honest and reliable. I recommend their services to anyone who has a business that needs to ship products from china or needs to inspect items.
Julie
Amazon Product Photography
Amazon product photography makes or breaks your Amazon store’s SALES. Unfortunately, many sellers still don’t take them seriously.
YOU must break this cycle to stand out!
I’ve been working in the China wholesale industry for over a decade. I’ve TAKEN, reviewed, and improved thousands of product photos. This article lists ALL THE INFORMATION you need for Amazon product photography. Enjoy the KEY to the success of your Amazon photography services!
Let the reading begin!
- Our Service List of Amazon Product Photography:
- Our Amazon Product Photography
- Get Great Product Photos Fast With LeelineSourcing
- our satisfied Clients
- 2000+ Clients Trust LeelineSourcing
- Amazon Product Photography
- What is Amazon Product Photography?
- Why is Good Amazon Product Photography So Important?
- Amazon Product Image Requirements
- File Name Requirements
- Amazon Product Image Optimization
- Some Types Of Amazon Product Photography
- How to take Product Pictures for Amazon?
- Amazon Product Photography Tips
- Why do I need to hire an Amazon Product Photographer?
- How much does a Product Photographer charge?
- How do I work with a Product Photographer?
- Top 5 Amazon Product Photography services
- Best 5 Amazon Product Photography Examples
- Conclusion
- Do you want a successful import business?
One of these many services is the complete representation of the product through detailed images. This is called Amazon Product Photography.
Through Amazon Product Photography, the buyer can see all the aspects of the things they wish to buy. This can improve the whole experience for them. This helps in building a good reputation.
What is Amazon Product Photography?
Amazon Product Photography means that the seller makes sure that their potential clients have ease in seeing the product. They do this by outsourcin professional product photography services to various firms.
This guide shows sellers how they can accomplish this professional product photography. Other than that, we will also specify instructions and examples of successful product photography.
When you want your product to be photographed, you send the product to the firm with instructions. Some of the instructions are granted and already confirmed.
But there are some instructions you can give. This includes how many high quality photos you want, multiple angles you want etcetera about professional product photography.
Why is Good Amazon Product Photography So Important?
It will come as no surprise to hear that attention spans are at an all time low. Your Amazon listing is competing for eye-time with just about everything else in your customers’ lives, after all.
It’s there vying for space among their chores and daily obligations. Get online and it’s competing with breaking news and the freshest social media drama.
Go on Amazon and it’s still competing with dozens of similar products, each screaming louder than the last to capture those eyeballs.
It’s nothing personal. Life today is just information overload, and your product is simply one more piece in the messy puzzle we call the modern world.
What can you do to grab that all-important attention from the start?
What could turn your listing product photography from just another on-screen thumbnail to the cash cow you’ve dreamed of?
The answer, you ask?
Excellent product photography.
Get this right product photography and you could see your pockets lined with money of the cold hard variety. Get it wrong and…well let’s just say that new yacht you wanted will have to wait.
Great Amazon Product Photography Means Great Conversion Rates
Yes, we know your product is great. You think ‘what difference will a few pictures make?’ And anyway, shouldn’t the value of my product shine through without resorting to such nefarious photography tricks?
In an ideal world, yes. But we don’t live in an ideal world, we live in a world of spiders and poverty and people who put pineapple on pizzas.
The fact is that humans are very visual creatures. We have some of the most advanced eyesight in the animal kingdom. We also have very short attention spans. This means to grab our attention you need to excite our visual receptors (also known as ‘eyes’) and do it quick.
Colors, angles, lighting and context can all make the difference between a photoset that converts and one that crashes
Of course, the rest of your listing product photography needs to be up to scratch too. But without that super-special photography to snatch their attention away from your competitors, it’s less likely to get that initial click. The result? Suffering sales…and no yacht.
Giving Your Amazon Product Photography Star Power
Now you’re probably wondering how to get these product photography that can apparently turn your fortunes right around. And naturally, you’re gonna stumble across plenty of conflicting information in your quest to find out.
So let’s make things easy for you.
Firstly, no you probably can’t create suitably high-quality product photography yourself (unless photography is a passion of yours and you’re skilled with the high quality camera).
Secondly, no you don’t need to pay four-figure sums to a professional studio either. That’s overkill, and think of all the starving kids you could help with that money instead.
What you need is a middle option where you get the photos you need without a price tag that resembles a mortgage. Better yet, by following the simple steps laid out in this guide, you’ll find your listings enjoying all the benefits that good product photography can bring.
Suggested reading: Alibaba Private Label
Suggested reading: FBA Shipping From China to Amazon

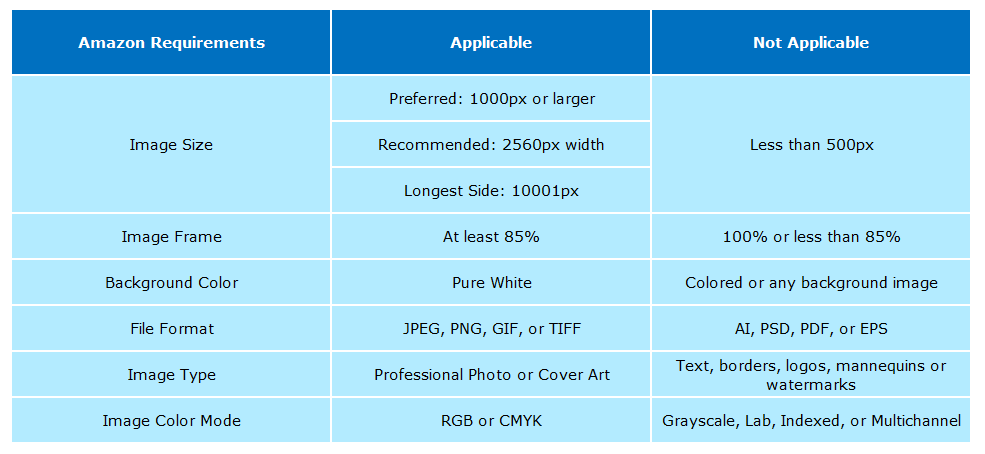
Amazon Product Image Requirements
When it comes to the product photography, there are some rules and guidelines that must be followed. If these guidelines are not followed, your product and lifestyle images will not appear professional and business-like.
There are some product photography technical requirements when it comes to the file as well as requirements for the setting of the photo-taking.
When you are taking the product photography, you should keep in mind that the environment and setting should be very professional. There should be a plain background for the product.
The image should only consist of the product and no other irrelevant object should be found. The background should be white for professionalism.
There are many other rules for the process of product photography. But I decided to focus on the main and fundamental ones. The aspects that made the most impact on my sales.
File Name Requirements
When you send the actual file, there are some technical regulations that you must follow. Like the file name, size, the resolution of the image etcetera. Let’s dive into it more.
The image should be in the following formats: TIFF, GIF, PNG or JPEG. I tried several files other than these, but they were rejected.
The minimum resolution limit for the image files should be AT LEAST 1000 pixels in height or width. Any smaller image will not be accepted so be sure to check. Furthermore, the color mode of the image should be RGB or CMYK.
Last, the filename should consist of the seller’s identification in the form of the 13-digit ISBN, Amazon ASIN, JAN, UPC or EAN. This filename should conclude with the file type e.g. .jpeg.
Amazon Product Image Optimization
Providing images for your products has a lot more utility than it appears so. Providing images also helps in Amazon Product Image Optimization.
But what is that?
Not to worry, we will explain all of it as well as ways to do it better.
Amazon Product Image Optimization means that due to the relevancy of your product images, it is listed higher in the search results. The concept is similar to SEO. Which I always say my clients should prioritize.
Except that in this case, the thing that gets optimized is your product rather than a web-page. The way this happens is that Amazon recognizes images of your products and it sees if they are relevant or not.
If they are, the Amazon A9 algorithm takes your product higher up in the search results. There are two things that are affected by your product images: CTR (Click through rates) and CR (Conversion Rates). Amazon determines the excellence of your product through these two mechanisms.
To increase optimization, you have to follow certain rules, like the ones listed above. You must take a 1000 x 1000 picture (at least) etcetera. The requirements are listed above and you can optimize your product images by following those instructions.

Some Types Of Amazon Product Photography
Everything Your Photo Set Needs:To fully flesh out your photo game you need a mixture of studio, lifestyle, and graphic design photos.
Most sellers manage one or two, but rarely do you get a seller who nails all three – and that’s where you can set yourself apart, get your photos right, and swoop in for major profit.
We’ll now go over the following parts to help you get a good understanding of each product photography-
- Studio images (including the BEASTLY Hero Image)
- Lifestyle photos with model
- Graphic design images
Studio Images (Including the BEASTLY Hero Image)
First up, studio images. There are the classic product-only shots on that all-important white background images. You know, the ones everyone associates with e-commerce products.
This is it. The Big Daddy. The Alpha and Omega of Amazon listing photography. Does discussing it first make it kinda anticlimactic? Maybe, but you’re here to learn so listen up.
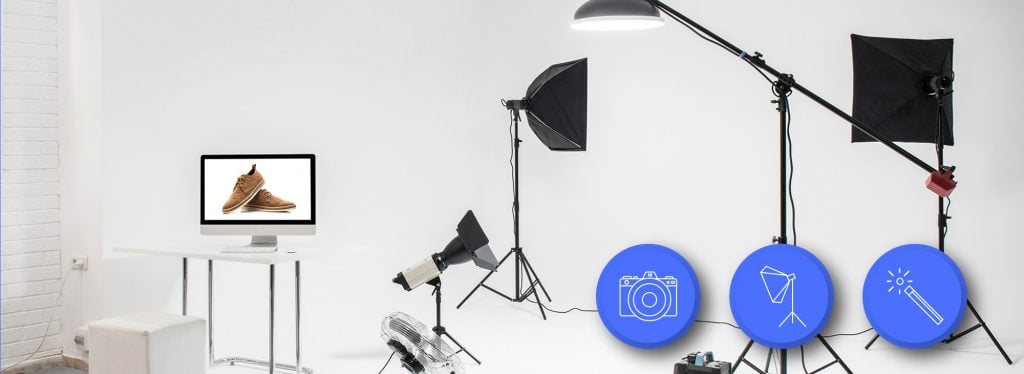
First off, getting the lighting right is absolutely critical, and if you don’t have extensive experience of photo-lighting then don’t even attempt to tackle this yourself. This is big boy stuff.
When hiring a photographer to get these product photography shots, take a look at their portfolio to check their lighting game is on point.
Also remember that product photography takes a different skillset to animal photography or architectural photography, for example, so your guy or gal should ideally demonstrate a few shots in the style you’re looking for.
Check these out to get an idea of what you’re after –
You should also think about what angles your product photography will look most flattering from and show off its main features (though this little tip applies to all photos in your listing).
Think about it – would you be more likely to click on a photo of the underside of a car, or one taken from a front-side angle that highlights the bold contours, strength and sex appeal of the vehicle?
We recommend you have a minimum of FOUR fantastic angles to shoot of product photography. Better still, try to snap it from an angle none of your page-one competitors have, so yours is presented in a fresh new light!
Finally, get any imperfections removed with a few professional image touch-ups and split test those Hero Images you’re torn between to see what gets the best engagement (don’t worry, it won’t mess up your keyword indexing or ranking).
If you’re new to all amazon product photography and image editing business then we recommend hiring a small handful of designers off sites such as Fiverr or Upwork to see how they do. It may seem like overkill, but out of that bunch you’re likely to find the right one for you.

The Hero Image
Now, among your studio shots will be your Hero Image. This is your principal image – the one that appears initially in everything connected to your listing. It’s the first thing people see and the single biggest factor to getting your product images noticed.
This means that getting your Hero Image right is absolutely critical. Crucial. Invaluable (Insert other words denoting importance here).
If you take nothing else from this whole article, remember this – your Hero Image needs to be so good it’ll take less than a second for your customers to spot it in a sea of similar images and decide this is the ideal product images for them.
Use the product photography tips above to ensure your Hero Image is a winner.
Lifestyle Photos With Model
A good lifestyle photo will show the product being used as it should.
A GREAT lifestyle photo will show the product images being used with a clear demonstration of the main product benefit being felt.
Managed to make your audience literally feel how the product will improve their life with lifestyle images? Then you’ve hit the bullseye, my friend.
But wait, this all sounds like some Jedi mind trick advertising, right? Wrong. Because doing this is more simple than you’d imagine.
First up, the model you’re using in your product images should resemble your target audience as closely as possible. They need to be able to put themselves in the model’s shoes so firmly that they can feel the dirt/sand/other interesting terrain beneath their feet.
We’re talking matching ages, clothing, socioeconomic indicators, ethnicity, subculture tells, etc. Trust me. This strategy alone BOOSTED my click-through rate by 70%!
Remember, the closer your model is to the target audience visually of lifestyle images, the more your target audience will identify with product images, envisage your product’s impact on their life and, finally, BUY from you.
Now a few tips on lifestyle photography –
- Make the lifestyle images about the product not the model
- Keep the field of depth shallow so you get that blurry-background effect
- Show the precise moment of lifestyle images your product is providing its intended benefit

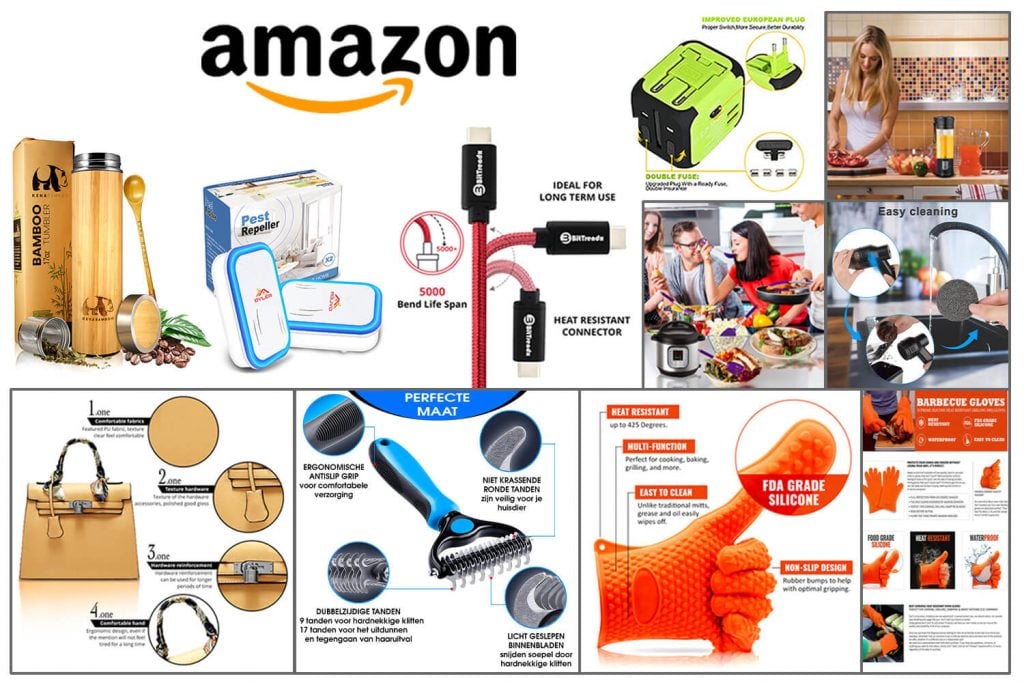
Graphic Design Images
The least appreciated of the three image siblings is graphic design photos. These are product images that use additional graphics to bring attention to the benefits of the product and quickly get important information across to shoppers.
A lot of sellers seem to skip graphic design photos based on a misunderstanding of Amazon’s rules. But contrary to popular belief, graphic design photos are only restricted from being used as the main image, and can freely be used elsewhere.
That’s lucky, because graphic design images can be deadly when used right. The matter of how to use graphic design photos right, however, depends entirely on your product.
Because of this, we’ve created a list of the different types of graphic design photos you can take advantage of. Each has certain benefits that can be used to powerful effect with the right product…

Scale Image
For all the benefits of online buying (the lower prices, the readily available info, great delivery options), the fact remains that buyers can’t physically see or handle their product until it arrives at their door.
This opens up all kinds of problem situations where the item turns out to be too small for practical use or too big to even fit in the customer’s room. After all, the camera can be very deceiving…
Scale images sort this out by providing measurements on the product photos, or place it alongside another item for relative comparison.
This means less confusion, more informed customers, and a sharp decrease in 1-star reviews from buyers who actually know the size of the item they’re purchasing!
Consequently, scale images are especially important for product images such as –
- Bags and other wearables
- Products in a wide range of sizes
- Items that differ from the industry standard in size
- Anything that could be rendered useless to a buyer who was especially small or large.
Promotion Image
If your product is part of a fabulous promotion then show it in pictures!
A promotion image essentially demonstrates the offer the product is part of in visual form, as seen in these examples –

Promotions can be especially effective with products that people generally buy in bulk or will be re-buying regularly.
The part of Amazon’s pages that demonstrate promos for products are often easy to scroll past, so doing a promotion image can be super-effective.
Your product photography promo offers can include buy one get one free (BOGOF), cross promotions (‘if you buy this then you get that for 10% off’), and promotion tiers.
Product Callout
A common but effective type of graphic design image, product callout images basically pair a photo of the product with a description of some highlighted benefit. Simple and powerful.
Here’s a few product photography tips on how to make your product callout images really pop –
- Take the image text straight from the bullets if you wish to, as long as its relevant
- Keep it straightforward and simple, but not so basic that it looks unprofessional. Aesthetics count!
- Ensure the visuals line up with the tone of the brand, making the font, colors and style all match with the wider listing
- Limit your callouts to four per image – any more than this and it starts to look messy. So consider splitting the benefits over two callout images if so
Comparison Images
This one’s pretty straightforward and a great choice if your product is oh-so much better than the competition.
Just create an image comparing your product to a few select competitor brands. And, of course, your product will come out on top.
Job done.
(Be careful, however, as if your product images is not objectively better than the rest then this tactic may backfire!)
Instructional Image
A great choice if your product is unfamiliar, needs installing, or is not immediately obvious in how it works.
An instructional image essentially demonstrates how to set up and/or use your product, clearly and understandably.
This overcomes some customer ambiguity, helps them envisage using it, and dispels those sale-killing doubts that come from confusion over what your product does or how it works.
Packing List Image
These are great for products that come as a set or have many different components.
Packing list images essentially demonstrate everything included in the pack when you purchase. This lets customers know what they’re getting and, again, removes the confusion that stops your market buying from you.
Pair a packing list image with a description of the contents in the main body of text and let your customers know exactly what they’re getting!
Multiple-Uses Image
Got a product that’s super-useful? Want to show how many ways it can be used?
Then multiple-uses images are just what you need to bring the value and utility of your product to life!
With these product images you can illustrate all the ways your product can be used – swiftly and clearly.
You can even demonstrate some of the more creative ways the product can add value to the buyer’s life too.
Bonus Image
A good option for anyone offering a bonus freebie with their product. A bonus image will demonstrate your free gift to your buyers, making it that much more tangible and appealing.

Image Breakdown of the Average Amazon Listing
- Your Hero Image, which will act as your main photo, complete with white background images
- Three lifestyle photos of your product in use
- Two graphic design images of your choice, with selections made to fit your product itself
- The wildcard – use your final image slot to choose a picture that best suits your product
Best Practice Guidelines
- Make each image 2000 x 2000px to match Amazon page optimization and keep that zoom function silky-smooth,
- Use Jpg format images for consistency and reliability
- Fit the product images to expand to as much of the frame as possible, so your product looks amazing even in thumbnail form
How to take Product Pictures for Amazon?
You may have read the rules and instructions and you may know everything about the product photographypictures, but you may find yourself in a fix when you have to actually take them.
Based on what we’ve noticed from more than half of our clients…
The product photography rules and regulations cannot be met by a lay-man or anyone who doesn’t have the right equipment. To accomplish this, you must get the help of companies that specialize in this business.
You must send your product to these companies with a set of instructions and requirements. These companies take your product and take all sorts of product photography for you.
You don’t have to worry about the product photography requirements as the companies can take care of them. So, if you have the right product photography equipment on hand, you can take the photos that way. If not, there are always companies ready to help out.
Amazon Product Photography Tips
The followings are some product photography tips and helpful information that can help you achieve optimization and success. I tried and verified each of them myself. You guarantee that they’ll bring you success.
· Begin with a consistent plan
This product photography tip applies to everything, not only product photography. But it is a valid step. You must always have a consistent product photography plan before you start. You must know which products you need to have photographed.
You must know which product photography format you have to follow of product photography. Furthermore, you have to know which company you have to go to. All of this must be kept in mind before starting.
· The magic of a white background
There are many product photography things that can make your photographs look professional. But the most notable aspect is a white background.
A white background can take your image from being a casual picture to an official-looking photograph. A white background can work wonders for your product.
The way of product photography your seller perceives your product is dependent on your image. If it is a lazy and careless image on a wooden table-top or something, your buyer will leave it as something non-serious. But if it is a picture of a product on a white background, your buyer will stop and consider it.
· Set the right lighting
Lighting is an important product photography aspect in all sorts of product and lifestyle images. Your buyer won’t be able to see a thing if your picture is a dim representation. Nor should it be bright in a ridiculous manner.
It should be just moderate. That way, your buyer will be able to see all the product photography details and parts of the product. This will help in the Product Optimization as well as the overall customer satisfaction and image quality.
· Keep the image resolution high
Your lifestyle images should have a resolution of 1000 pixels at least. If your product photography falls below this, then Amazon will not consider it to be proper.
Furthermore, it will not provide an in-depth view of your product photography for the buyer. It will just become blurry and distorted. You must keep the resolution at 1000 x 1000 at least.
You can go higher if you like, but the minimum should fall in the correct criteria. Therefore, keeping the correct resolution is also very important for optimization and customer approval.
· Pay attention to the product size
When you are taking photographs for your product or you are sending it to someone else to do so, you must always keep in mind how much space your product takes up.
This way, you can take photos with the proper amount of zoom so that you can display each and every aspect of the product.
You can understand this product photography through an example. Let us say that you are selling an electric space heater. Now, you must take the photos and the size into consideration.
You must take the product photography from a distance. On the other hand, if you are selling a cell phone, you have to take a picture from close up.
· Show different angles of the product
Another important aspect that should be respected during product photography is that every angle should be covered. This means that your photo should offer complete coverage of the product.
There should be a 360-degree view. This helps your buyer to better see the product. This also is an important factor of product photography that plays a part in Product Optimization.
In a normal case, four pictures should enough as you take photos of all four sides of your product. If it has a different shape, the number of photos needed may vary.
· Use a tripod or a steady surface
Using a tripod or a steady surface can grant a clear photograph. If you are taking a photo while holding the high quality camera, your hand can shake or tremble, which can blur the image.
This will result in an unprofessional representation. If you use a tripod or any stand, your product photography will be steady and clear.
· Avoid placing additional items with the product
If you are taking a photo of a certain product, you should make sure that only that specific product is visible in the picture. Some amateurs or one-time sellers just put the item on their desk and take a photo.
When they do this, there are all sorts of irrelevant things just lying around. This product photography makes the whole image very unprofessional.
If you do anything like this, you can lose potential customers. And if nothing else, you won’t be able to get optimized. To avoid any sort of negative review or evaluation, you should remove any irrelevant material from the photo.
· Do not put immodest content
When you take a photograph of product photography, always remember to display everything as it is. You should refrain from any type of false advertising.
You should avoid making bold claims in your product description as well as your product photographs.
Why do I need to hire an Amazon Product Photographer?
Now, the question that we all ask ourselves: isn’t product photography something we could ourselves? Indeed it is but if you are a serious seller, you need to make sure that everything you provide is top-class of product photography.
You take your own photographs. However, most top-notch images I’ve seen are from professional photographers.
So, here are some things you must think about when deciding whether or not to hire a professional photographers .
· Time
Hiring a product photographer can save you a lot of time. The time you would otherwise dedicate to other promotional activities will be wasted if you chose not to hire professional photographers.
When you hire professional photographers, you can utilize your time to accomplish other helpful activities. Spending money on a professional product photography is way more cost-effective.
· Money
Like I said before, hiring professional photographers to take care of product photographs is more cost-effective than doing something yourself. You may be unsure about this so let me break it down for you.
First comes the setting; which means the effort you will have to put in finding the right place and background to take some good product photography pictures. Then, the equipment; an unnecessary expense you will have to bear.
All this adds up to more than you would have to spend on hiring a professional product photography staff. Thus, it is much easier and time-saving.
· Skills
There is one thing no amount of money can buy and no matter what you do you cannot get without spending time and that is the product photography skill, if they can create high quality images.
You can have the equipment, you can have the time but you cannot match the professional standards unless you have that kind of product photography talent to create high quality images. Product Photography is an art; a craft that requires creativity and insight.
A skillful photographer can give you a better and easier high quality images than any other method you choose to apply.
· Experience
As the skills, the product photography experience is something even more precious. Experience is something beyond skills as it is independent of natural talent.
Experience can only be gained through spending time. Hiring a professional makes sure that an experienced person takes care of your job. It is also one of the many reasons why you should get professional help.
· Network
The most long-lasting and notable benefit of hiring a professional is that you can centralize your tasks. Not sure what that means? Let me give you an example.
Say you go to someone and you tell them you want some photographs for your products. Now on top of helping you with that, they can suggest or recommend someone for anything else you may need.
Suppose after the pictures, you need to advertise your project. Your photographer can help you with the pictures and then point you towards a trustworthy advertising firm.
This means that you can enjoy their links and contacts instead of having to find your own.
How much does a Product Photographer charge?
You may be convinced that hiring a professional is more cost-effective than dabbling in anything yourself. But you may wonder you much money that will cost you.
While we can assure you that the end cost will be much less, the charges are very variable.
Speaking from experience, photographers’ charge varies depending on the number of pictures needed. Plus, the size and amount of the products, etcetera.
How do I work with a Product Photographer?
Our team has worked with many product photographers. Working with a product photographer is simple and straightforward. The whole procedure entails the sending of the product to the photographer with a set of instructions.
What happens is that you send the product to them along with certain requirements. And what they do is that they take photographs according to your needs and desires.
These product photography instructions consist of the number of photos, angles to cover, size and dimensions etcetera. After you send the package, your part in the whole affair is done.
Top 5 Amazon Product Photography services
You may feel like you don’t know any reliable firm or company to help you with product photography. Thus, we will now list reputable companies that provide this service.
1. Leeline Sourcing
Leeline sourcing is a company that provides a lot of services. Among their many services is to connect their customers with a proper company.
If you need to have your products photographed, they will set you up with the most reliable and trustworthy firms and reasonable price. They shoot pure white background images with professional studio lighting and camera equipment. This ensures that the service you will get will be authentic and professional.
They’ll make constant tweaks until the image is ideally suited to your brand image and message. They charge you a small amount for the whole affair. This company quoted me the best rates for my sample products with excellent product photography service.
2.Amazon Official
Amazon itself also provides a product photography service for its clients and customers in Amazon marketplace. Instead of going somewhere else, you can bring your business to one place and ask Amazon to photograph your products for you in Amazon marketplace.
So far, this product photography service has elicited positive reviews. This is also a very trustworthy and reliable service to use.
3.Productphotography
This site is also a good place for you to get your products photographed. This company also follows the same procedure I told before. They ask you to ship your goods to their studio, where they take the photographs in a professional manner with reasonable price.
Then they send the pictures to you and do whatever you need with the product itself. Their studio is located in Las Vegas.
4.Viral-Launch
Viral-Launch is another product photography service company that aims to increase your product optimization through professional and best photographs.
Not only can they provide photographs for you but they can take care of other aspects that affect Product Optimization. They can help with advertising and increasing the relevance of your product.

5.Thrive Product Studio
Thrive Product Studio provides photographs and product images for all sorts of online businesses. They provide discounts and deals that can help you in the long run.
If you have a big order, Thrive Product Studio can help you cover all it while giving you reasonable deals and packages.
Best 5 Amazon Product Photography Examples
If you feel like you can do better if you have a specific role model in front of you, here are 5 examples of the most outstanding product photography there is.
These products were shown in a variety of professional aspects. If you look at these examples and do the things they did, you are on the right track.
1. Nest Thermostat
This device was a useful home appliance. The Nest Thermostat not only controlled the temperature of your home, but it provided immense ease while doing so.
It was quite modern. It could be controlled through the application. It was also Alexa-friendly. You could link it up with your smart home devices.
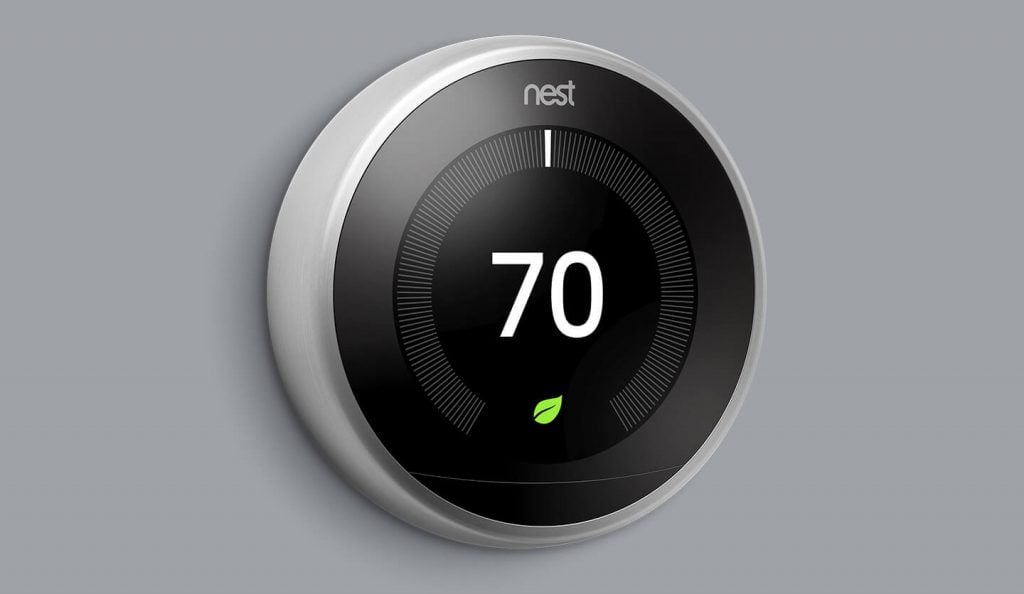
What they did well:
- The Nest Thermostat was shown in a variety of backgrounds. At first, it was shown in the pure white background images. This helped to show the various angles of the product.
The photographs shown in the pure white background were very professional. Other than that, they also took professional photos that showed the product in lifestyle settings. - They showed several multiple angles of the product. Due to this, the product was shown and all aspects of it were visible.
Multiple professional photos were taken to show an all-around representation. These pictures also showed the interface and looks of the device. - They also showed an app that you could use to control the thermostat. The display of this app in the photos along with the device gave off a very professional air. The functioning and features of the device were represented through imagery.
What could be improved?
- The one thing that was lacking in the whole affair was the lack of comparison of product photography. If you want to show your customers that you sell and provide something unique, you have to make comparisons between your product and other product. When it came to the Nest Thermostat, they failed to do so.
- Another thing that felt missing was the automation and lifelessness in the photos. The Nest Thermostat is made for humans to use, and the photographs should have shown some people using it. That could have been a whole person or a hand that was pressing or touching the device.
- The Nest Thermostat is very easy to use. In the photographs, another thing that could have been done was the representation of someone using the interface with apparent ease. An elderly person or a teenager could have been shown in the images. This would have shown that the product was easy to use.
2.Bowflex Dumbbells
Bowflex Dumbbells are quite well-known. You can see why if you see the photographs they have provided with their product. Here are the things they did or didn’t do well.
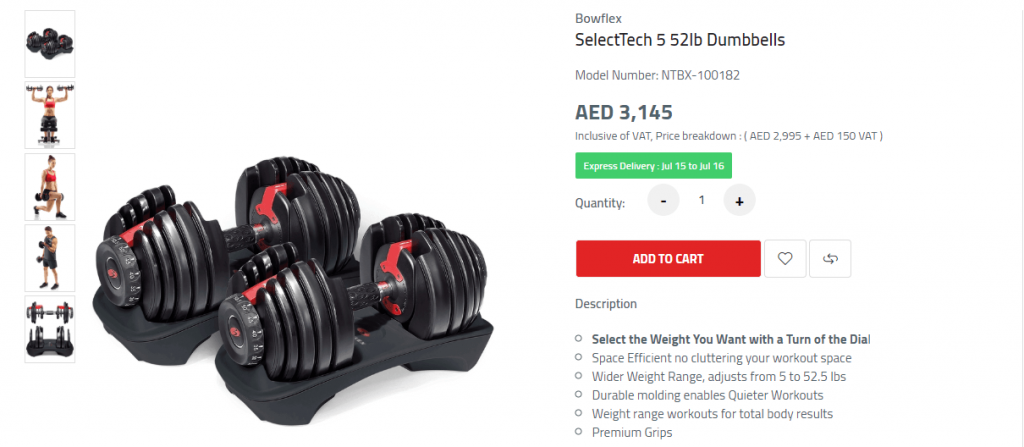
Things they did well:
- Like we discussed before, including people in your photographs can serve a lot of purposes. Even if you don’t show faces in the photographs, you can show your product being used. This can help your customers avoid any sort of confusion. This is a professional step that was taken in this case.
- When they photographed the Dumbbells, they also threw in some complimentary free things. In this case, the free mobile application was shown in the images.
This helped in customer satisfaction. The dumbbells were shown in all modes. This means that the full set of weights was shown as well as the lessened weights.
This showed the options of modifications the customers were given. Showing all available options on a product is a very professional activity to do.
What could be improved?
- One of the things that the previous product did better than this one was the representation of the product in lifestyle images and settings. Bowflex Dumbbells were not shown in any home gym or any sort of everyday place. This was something that could have been done but was not done in the photographs.
- The lack of an infographic was very noticeable. The photographs should always include a visual representation of the instructions within the photograph. If the product even has the slightest technicality, it should be addressed through an infographic.
- Bowflex Dumbbells offered a 2-year warranty with their product. The problem was, they didn’t show it in the product photographs. If they had, their customers would have learned about it.
3.Furbo Dog Camera
Here are some of the things that were executed and some that were left out.
What they did well:
- They included an infographic in their photos. This made all the instructions and guidelines very clear. Other than that, all the features of the product were shown. The specifications and qualities of the camera were also shown alongside the product to make everything clear.
- They also showed the real-time barking alert app that was available. This app was necessary to have the full experience of the product. The photographs showed the app and what it could do.
- The lifestyle images indicated the ease of usage of the product through smart connectivity.
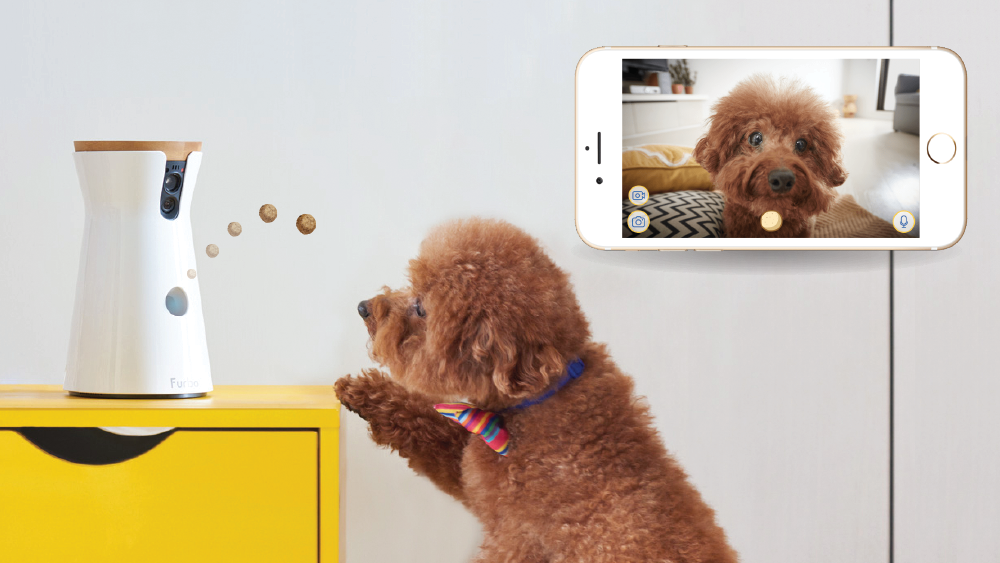
What could be improved?
- One of the things I found lacking in the photos was the representation of the humans interacting with the product and their pet. This feature may not sound that important, but it can highlight the ease and convenience of the product.
- Show a step-by-step guide in the picture. If the product you are selling is of an electrical nature, all the steps should be included. This can help your customers avoid a lot of confusion.
- Once again, I saw no comparison between this product and the other competing products. When your customer is in a dilemma about which product to choose, a comparison can help them see all the differences. And if you show the comparison, you can win your prospective clients over.
4.VIVO standing desk
The VIVO standing desk was an adjustable desk with a lot of utilities and options. This appliance is also a very good example of what your ideal product photograph should look like.
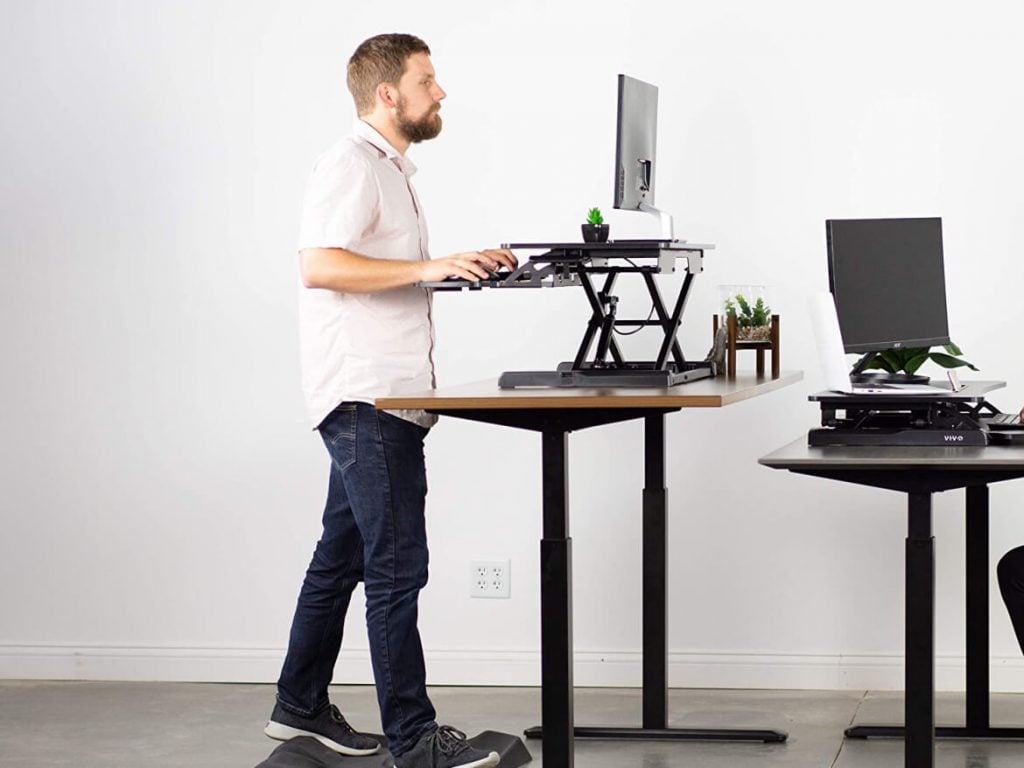
What they did well
- Since this was an adjustable appliance, the photographs showed the dimensions and measurements. Other than that, the photos also showed a weight limit. This desk was a standing desk, so the conversion from a normal desk to the taller version was also shown in detail.
- The photos included the desk being used in real lifestyle images. The desk was shown being used as a computer table. The photographs showed monitors and such things.
- The standing desk is very easy to install and the photos showed this.
What could be improved?
- The main thing that was lacking was the exclusion of a person in the photographs. A hand model could have been shown using the desk in a variety of settings.
- Show different heights of people with respect to the adjustable size of the table. Meaning, a silhouette could have shown how tall each stage was. This could show the sizes and tallness.
- Show the option of putting the desk flat down. If someone wanted the desk to operate like any normal desk, they would see that it was indeed an option. This is the main feature of this product. This should have been shown in the photos.
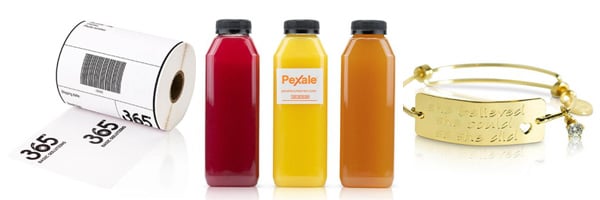
5.Tide PODS
Here are some of the pros and cons of the photographs of Tide PODS.
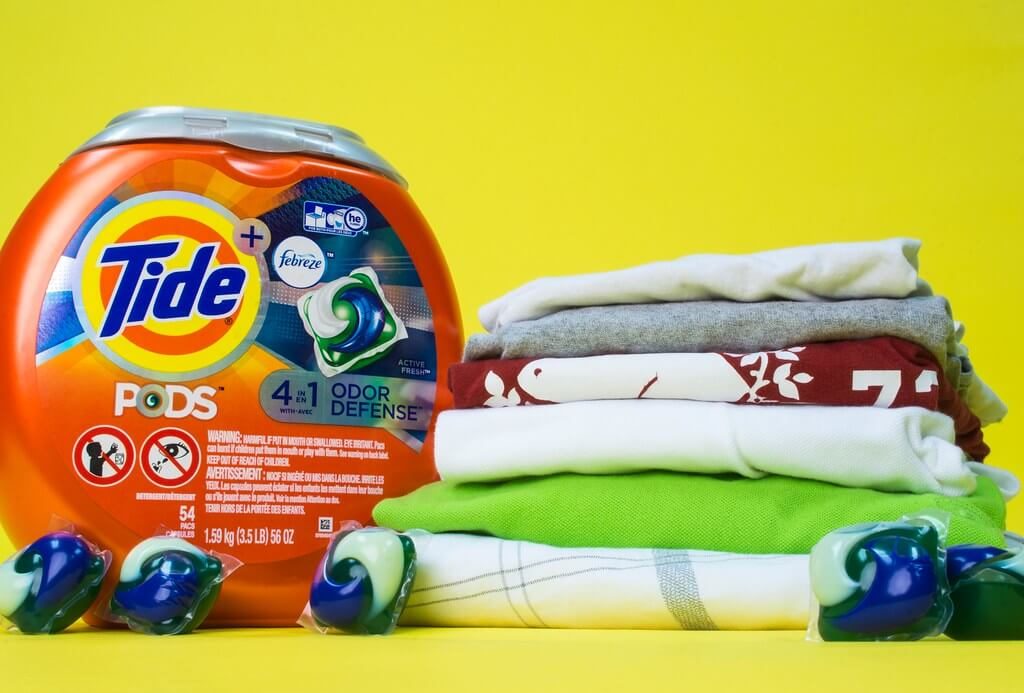
What they did well:
- The photographs were vivid and bright.
- This showed the brand’s identification well.
- The product comparison was clear and precise. The effects of the detergents on the clothes were illustrated.
What could be improved?
- An infographic could have been shown to explain the size proportions and the number of Tide PODS needed.
- The different fragrances and scents of the Tide PODS could have been shown in the photographs.
- A lifestyle image could have been included which showed the product in use.
Suggested reading: Alibaba Payment Failed
Conclusion
Amazon Product Photography is a service provided by lots of reputable companies. It is something that is obligatory and important for any seller on Amazon.
In this guide, we have seen the various requirements and rules that come with Product Photography. We have also discussed various companies that can help you out.
Hiring someone to do this job for you is more cost-effective than doing anything else.
We also learned about some of the exemplary products, from which you can learn all sorts of things. Things like backgrounds and environments also play a part in professionalism.
Related Resources
Do you want a successful import business?

Hey, I’m Sharline, co-founder of LeelineSourcing. We’ve helped 2000+ customers import from China.
Do you want a better price on product or shipping?